

Map & Boundaries
Draw your farm boundaries on the map, organize fields into tracts, and navigate the map with confidence.
Understanding the Map Screen
When you open Numanac, this is the main map UI. The numbered points show what each area does.
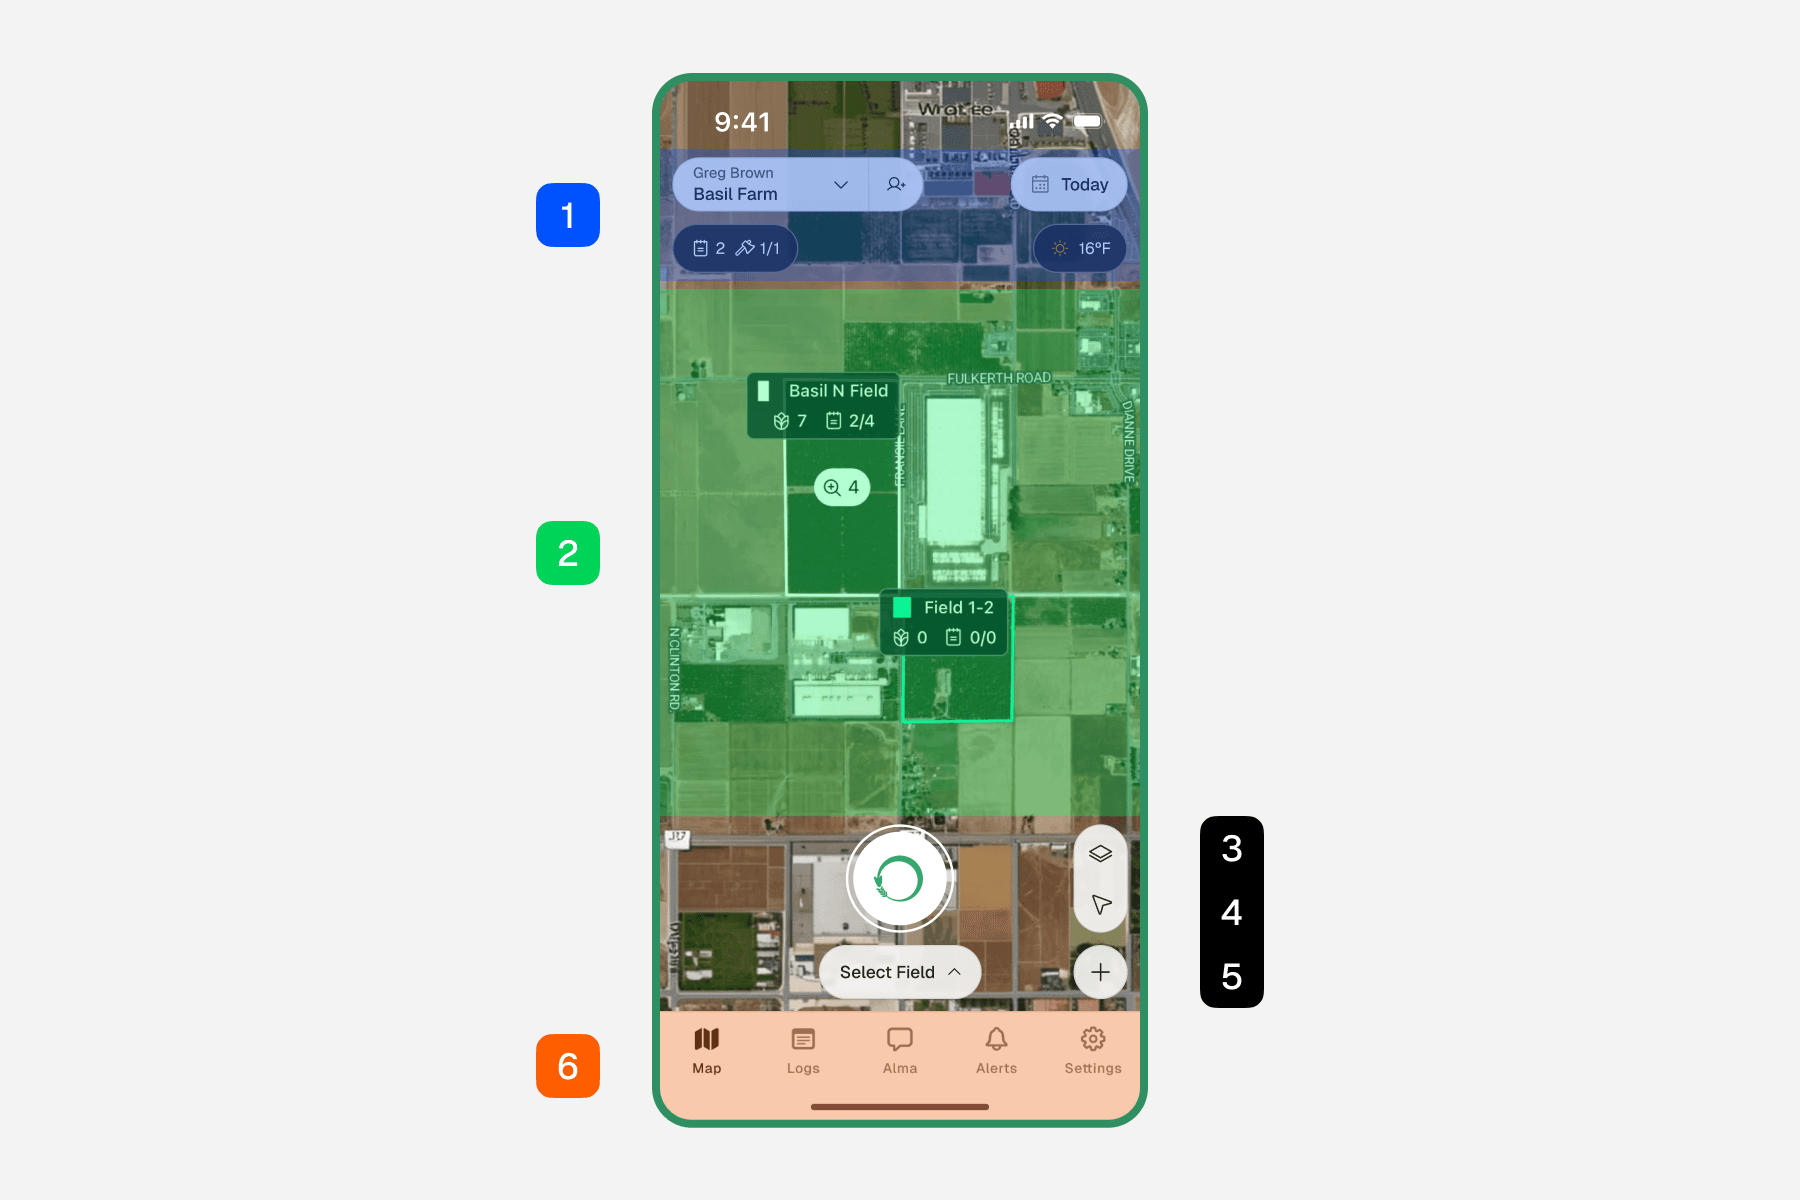
Top bar
Shows your current farm and quick status info like weather and pending tasks.
Map area
Your main working area. Pan and zoom to inspect fields and boundaries.
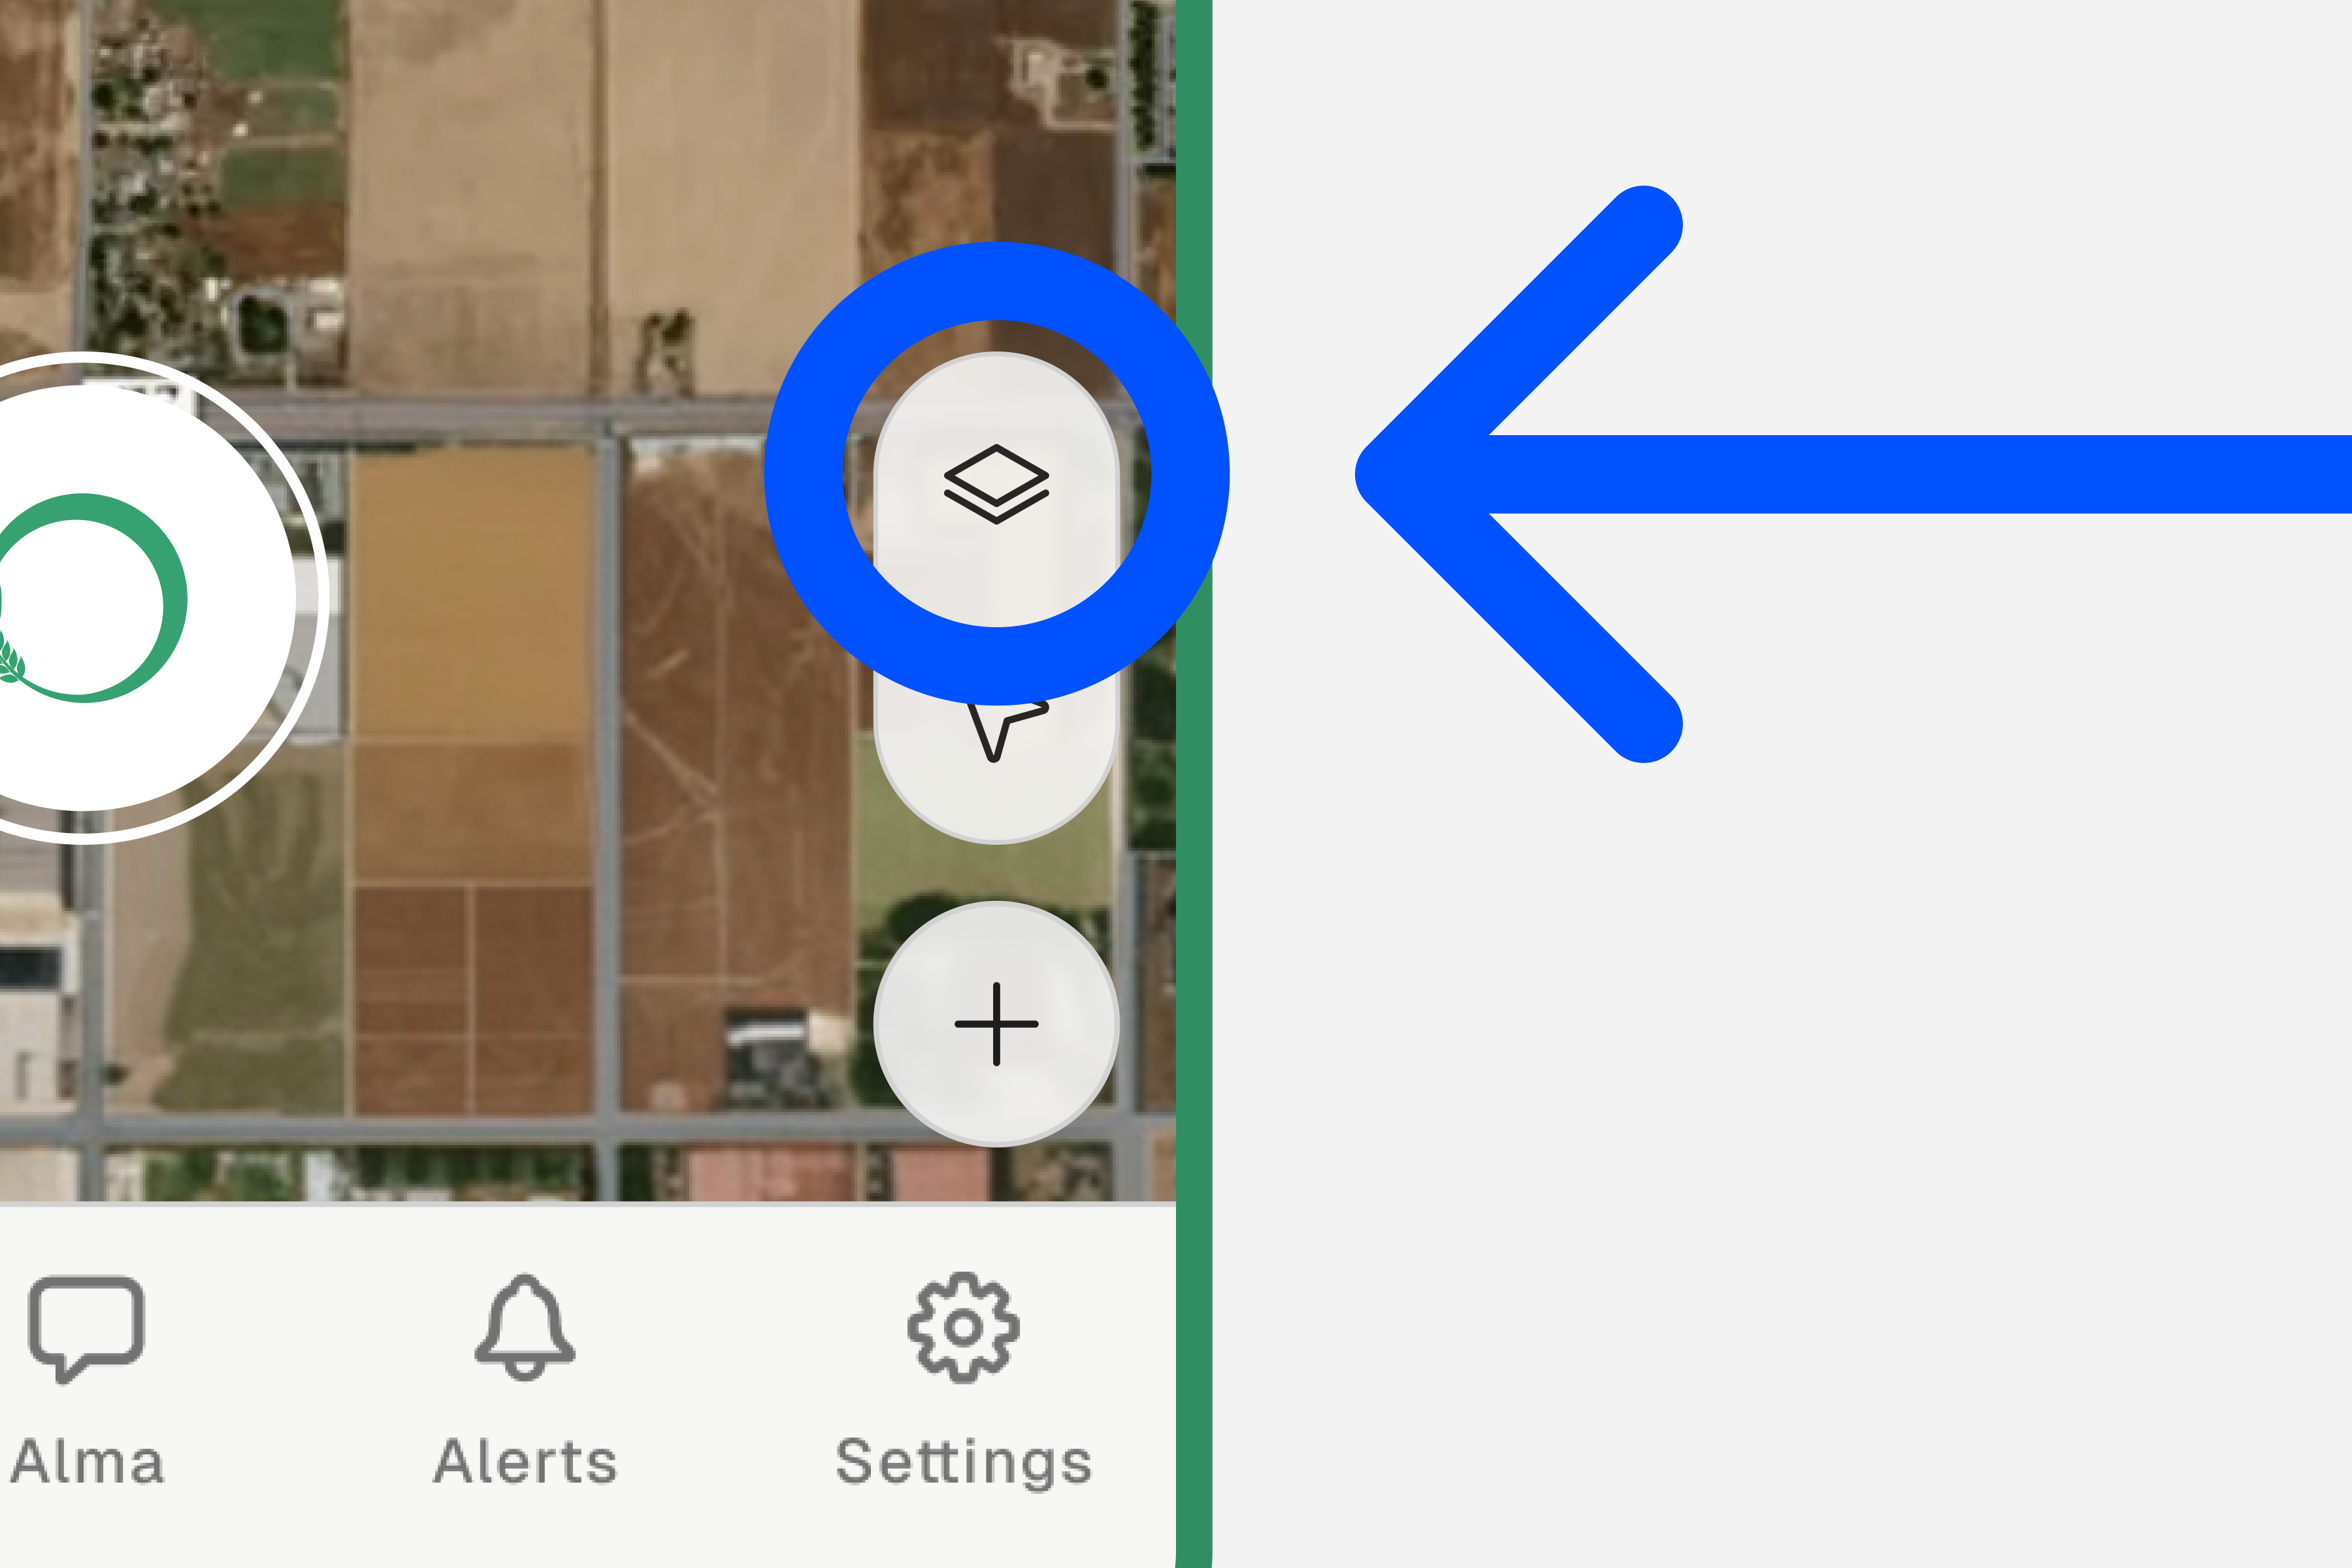
Layer button
Open layers and switch view mode between Field and Tract.
Mic button
Press and hold to quickly log a record with your voice.
+ button
Create a new Field or Tract directly from the map.
Bottom tabs
Move between Map, Logs, Alma, Alerts, and Settings.
Drawing Field Boundaries
A "Field" is a single area of land — a paddock, a plot, a greenhouse. Draw its boundary on the map.
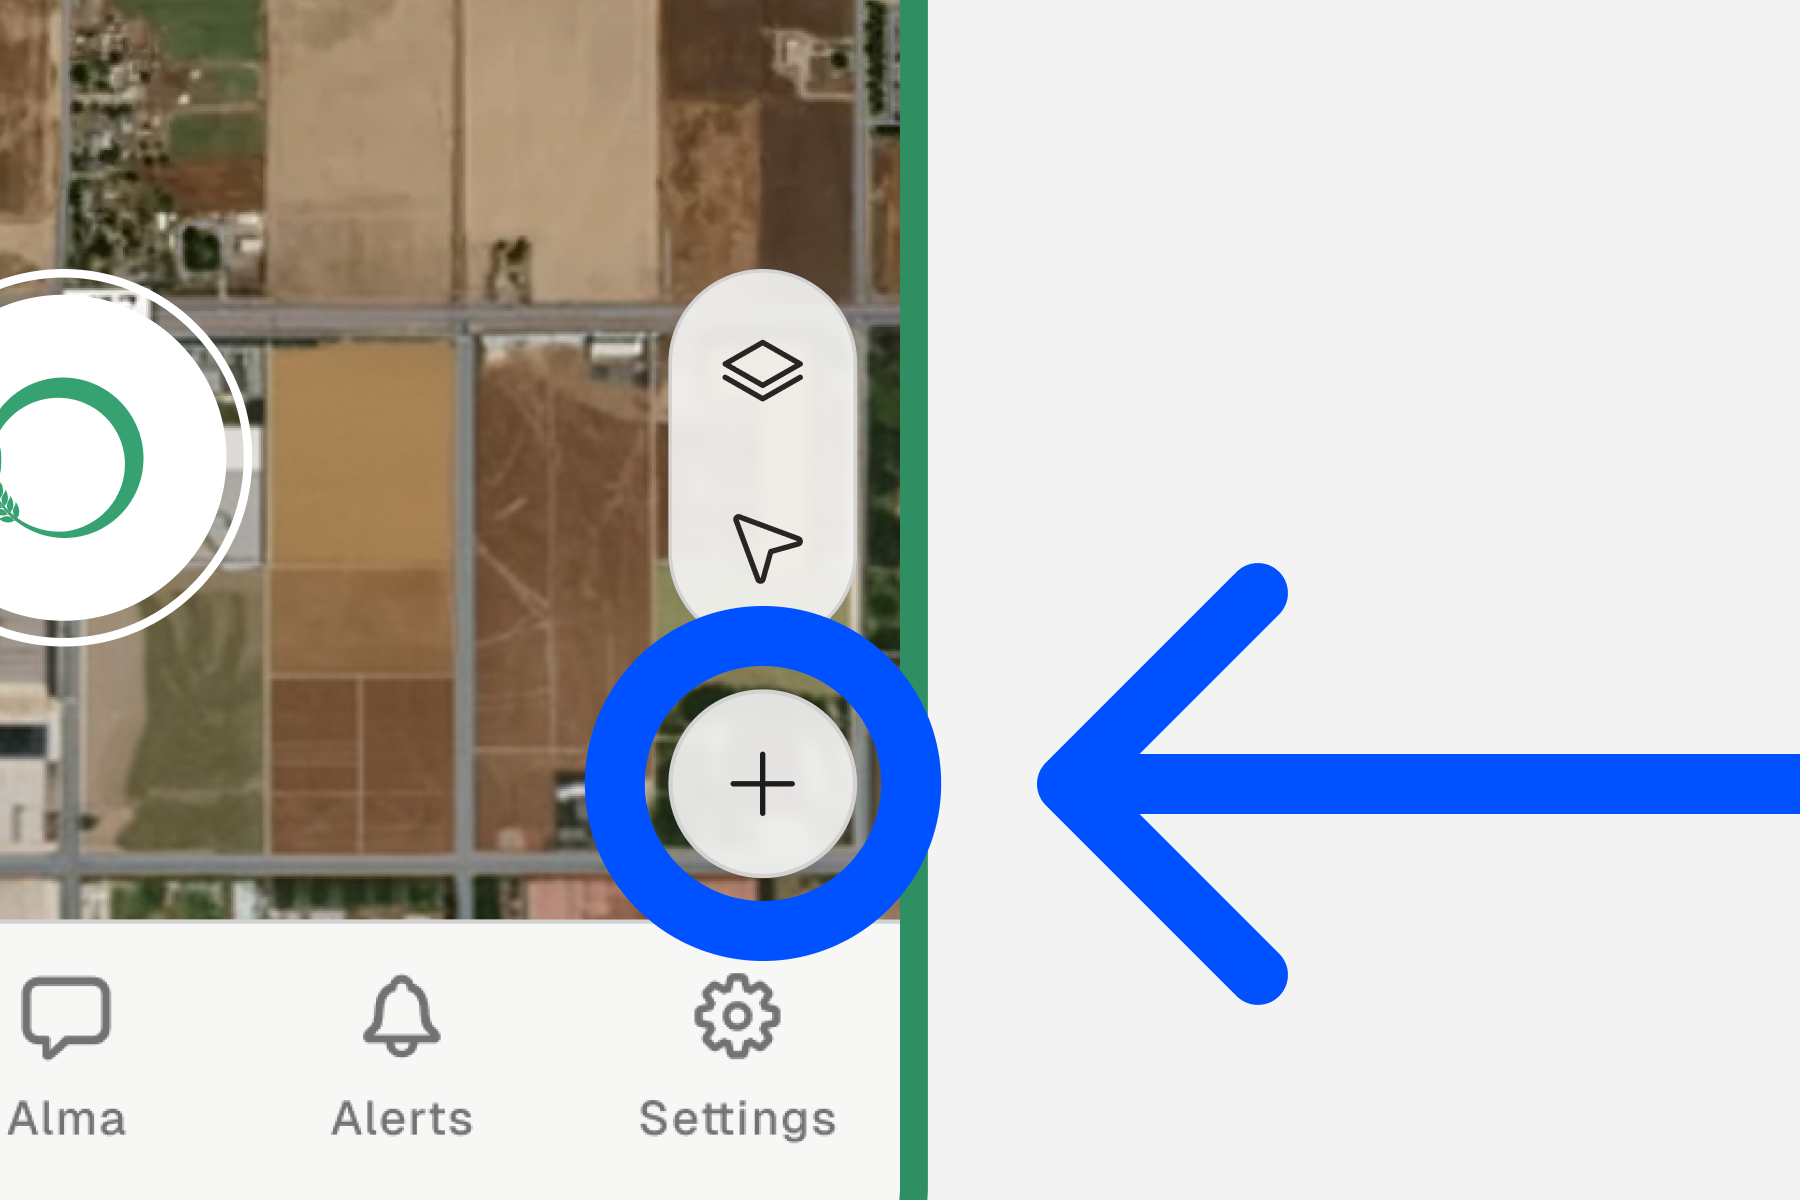
Tap the "+" button
You'll find the + button in the bottom-right corner of the map screen.
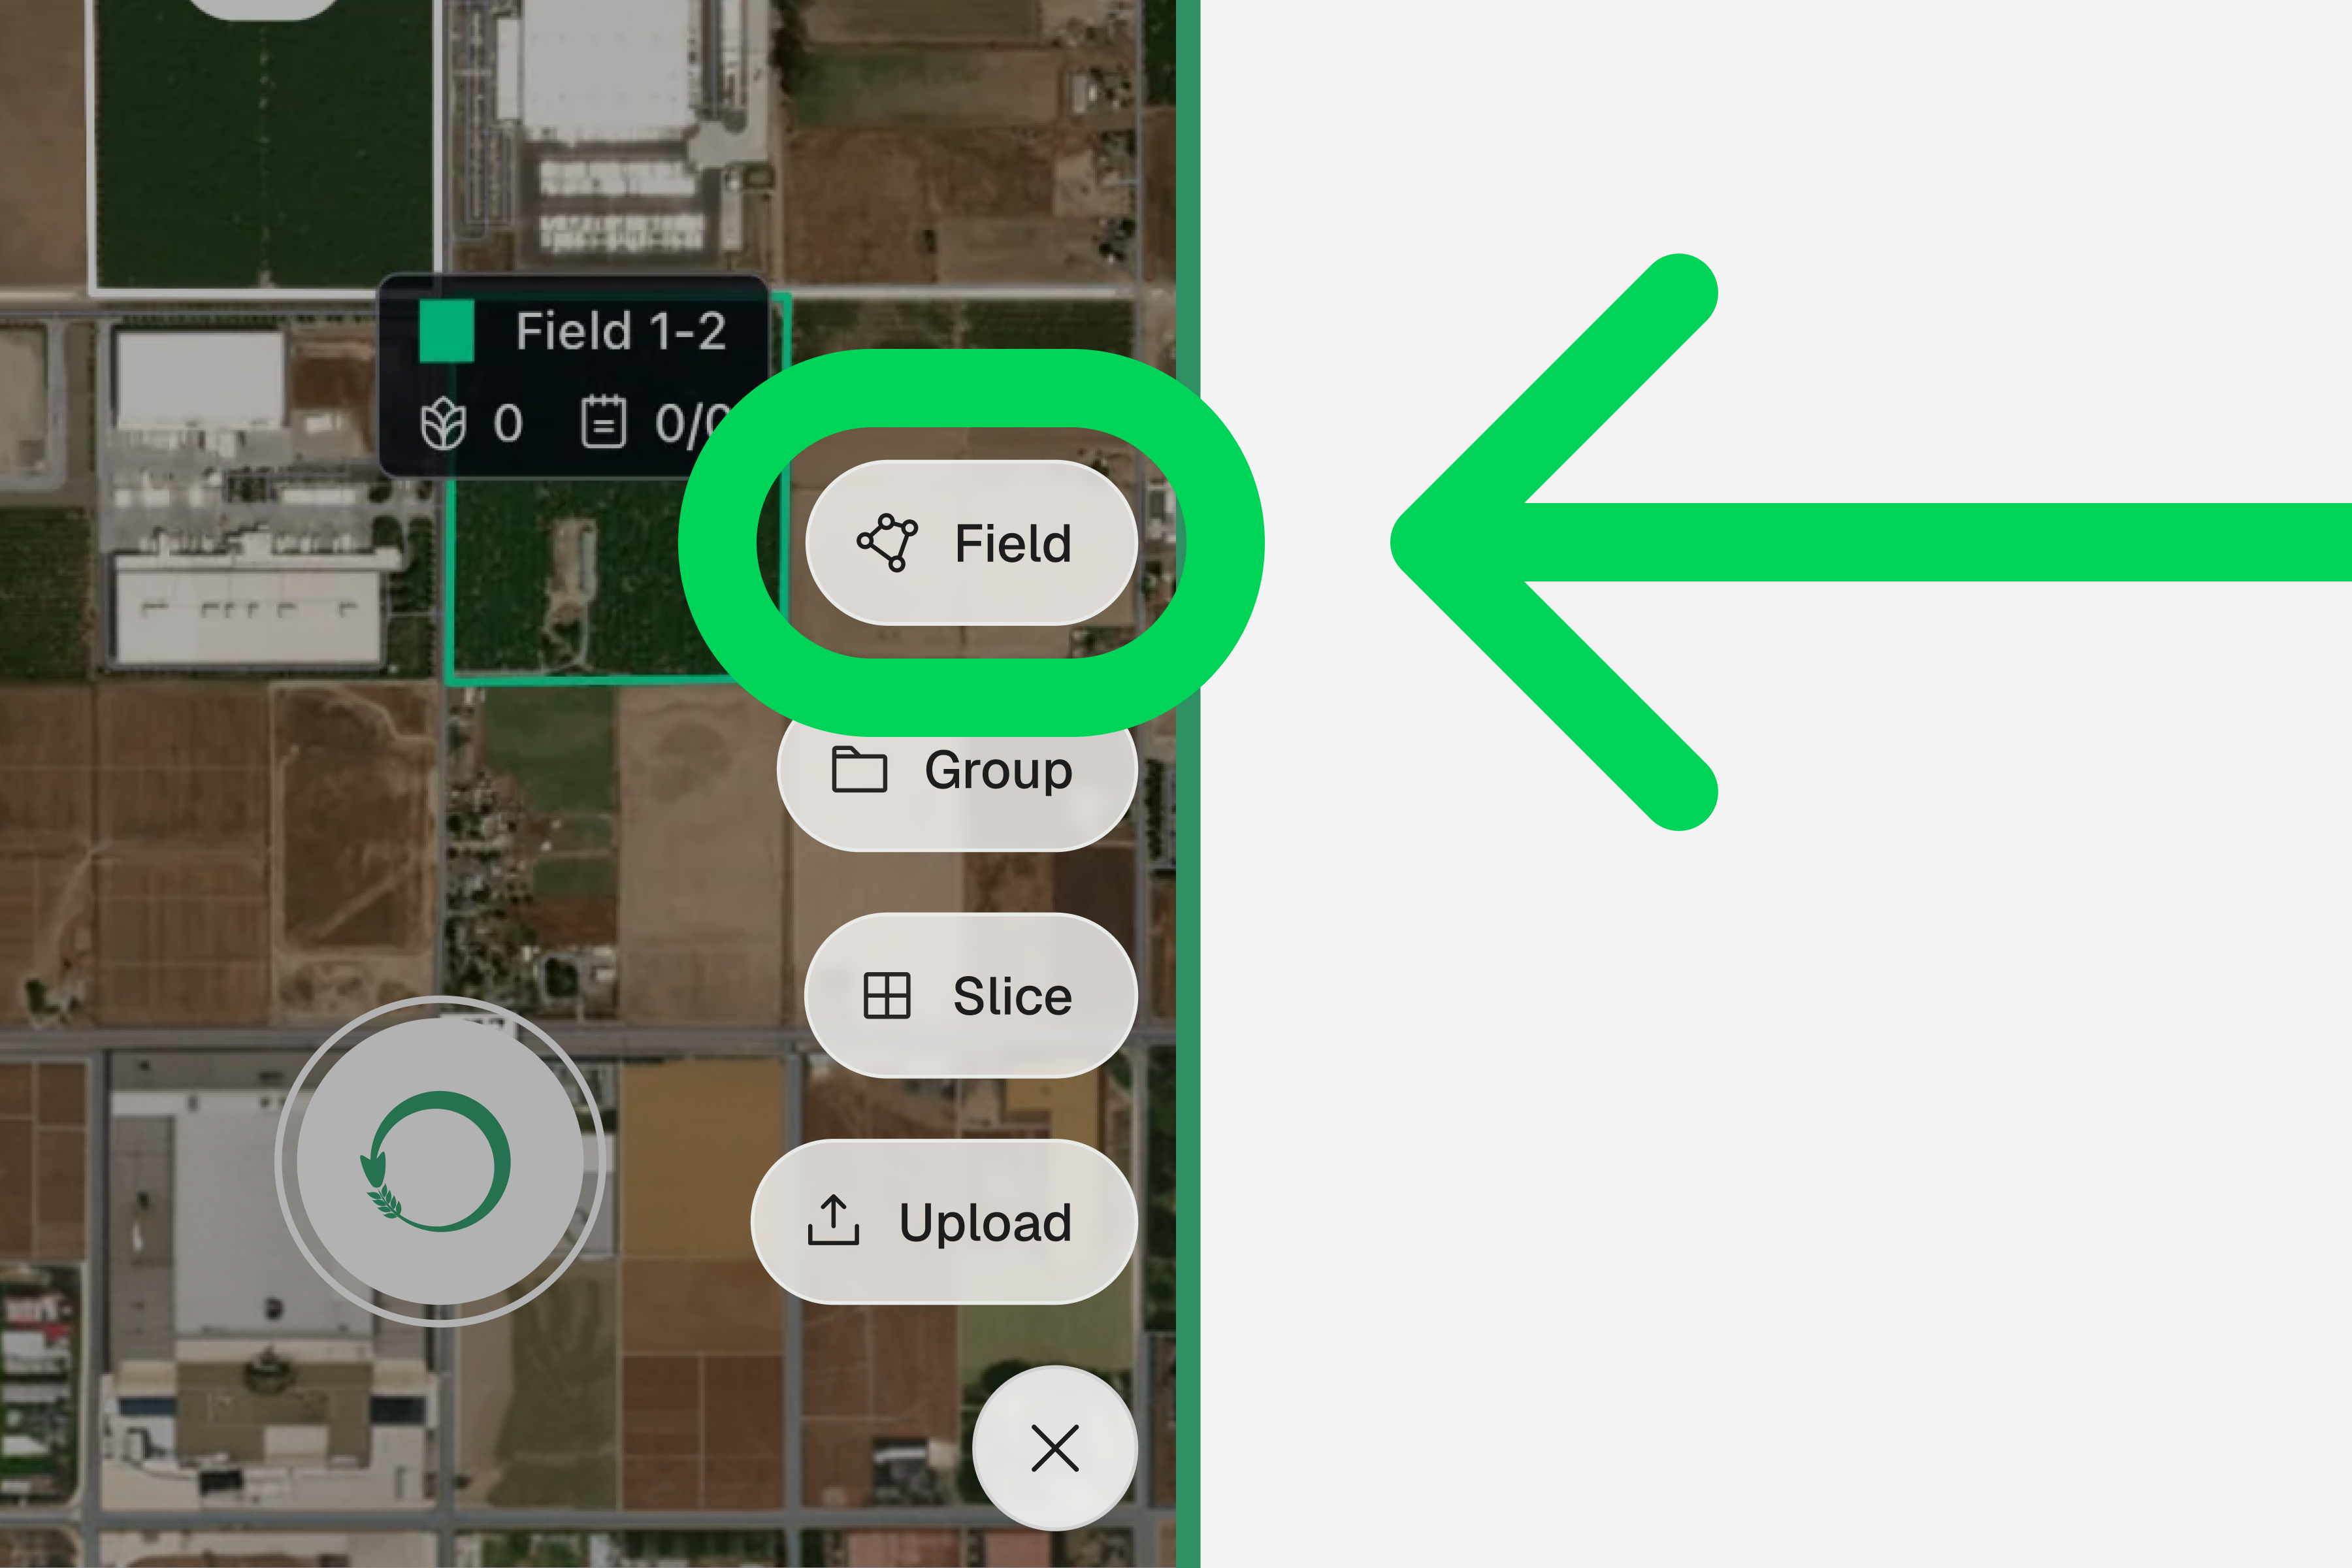
Tap "Field"
In the menu that appears, tap Field to start field boundary creation.
Tap points around your field
Tap each corner of your field on the map to place markers. To finish, tap the first corner again or tap Confirm. After that, you can pick a color and fine-tune the shape by moving vertices for precise placement.
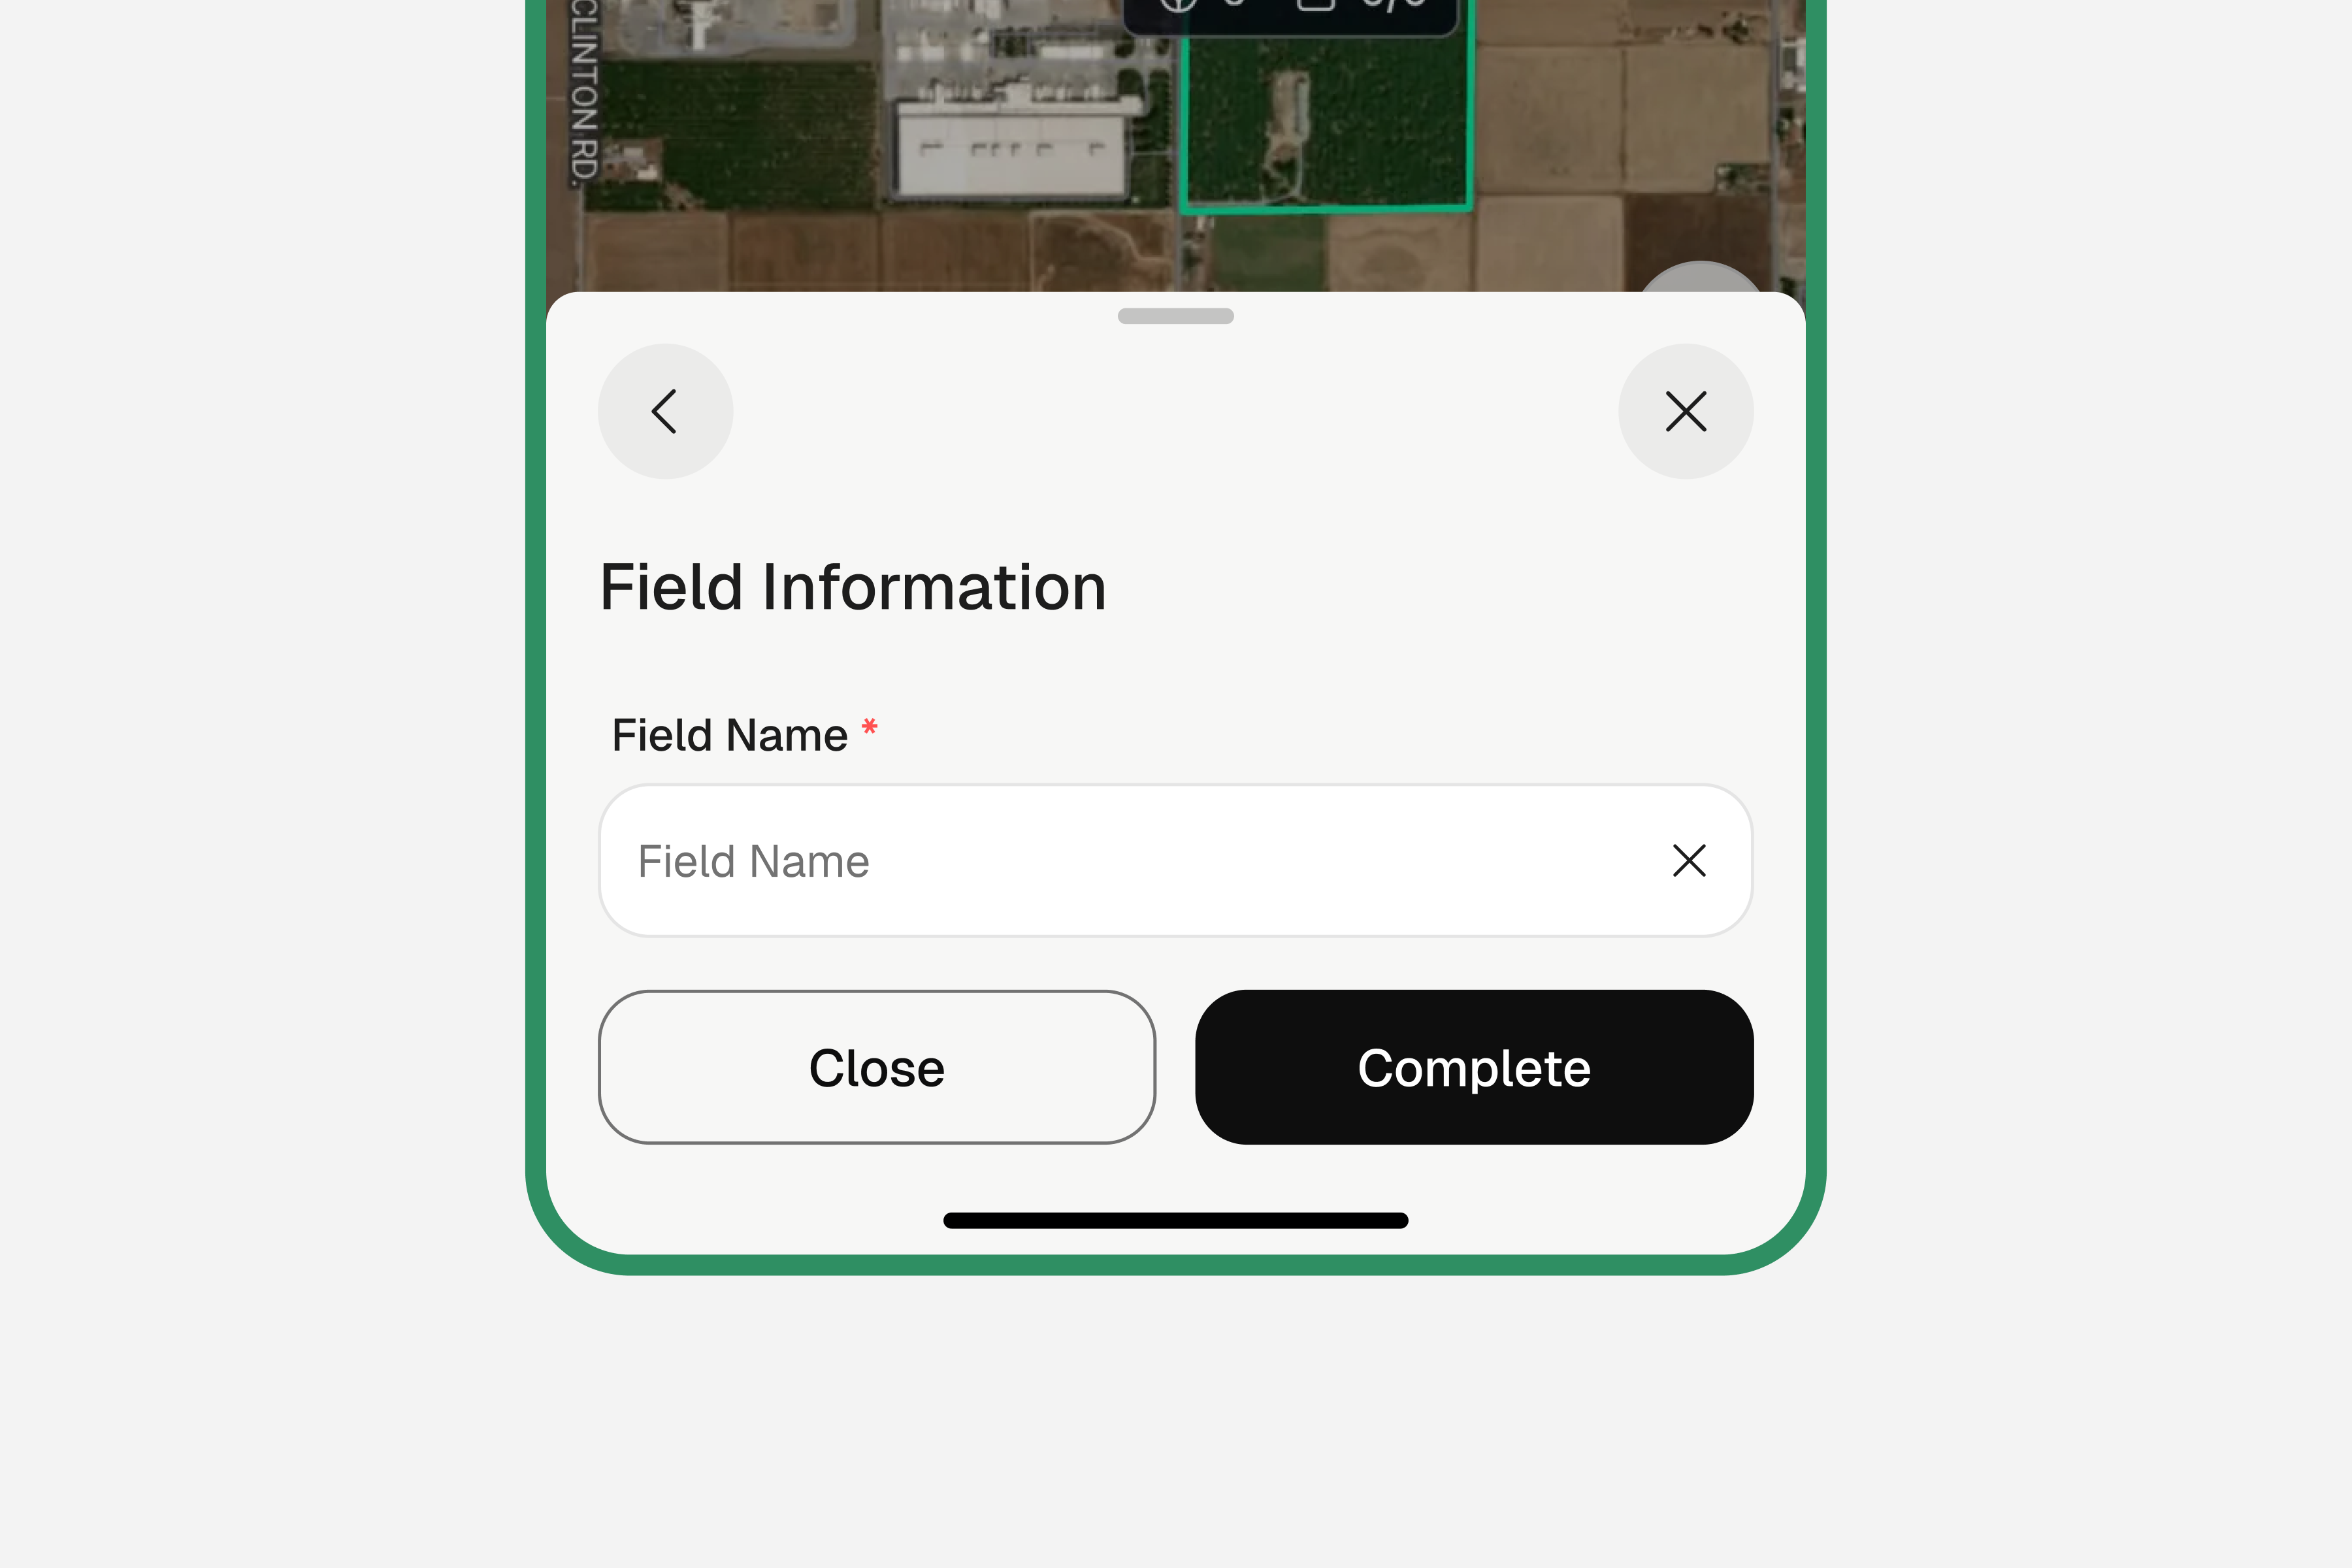
Name your field
Tap "Next", type a name for the field (e.g. "North Pasture", "Tomato Plot 2"), then tap "Continue".
Done!
Done. Your field now appears on the map. Tap it anytime to view details or log activities.
Tips
- You need at least 3 points to create a boundary.
- Fields cannot intersect each other. Keep boundaries separated.
- You can create a hierarchy by drawing a field inside another field as a sub-boundary (subfield).We'll cover this in more detail next.
- Already have a shapefile (.shp)? Tap + and select Upload to auto-create boundaries.
Creating Tracts
A Tract is a group of multiple Fields — useful for organizing large farms with many separate areas.
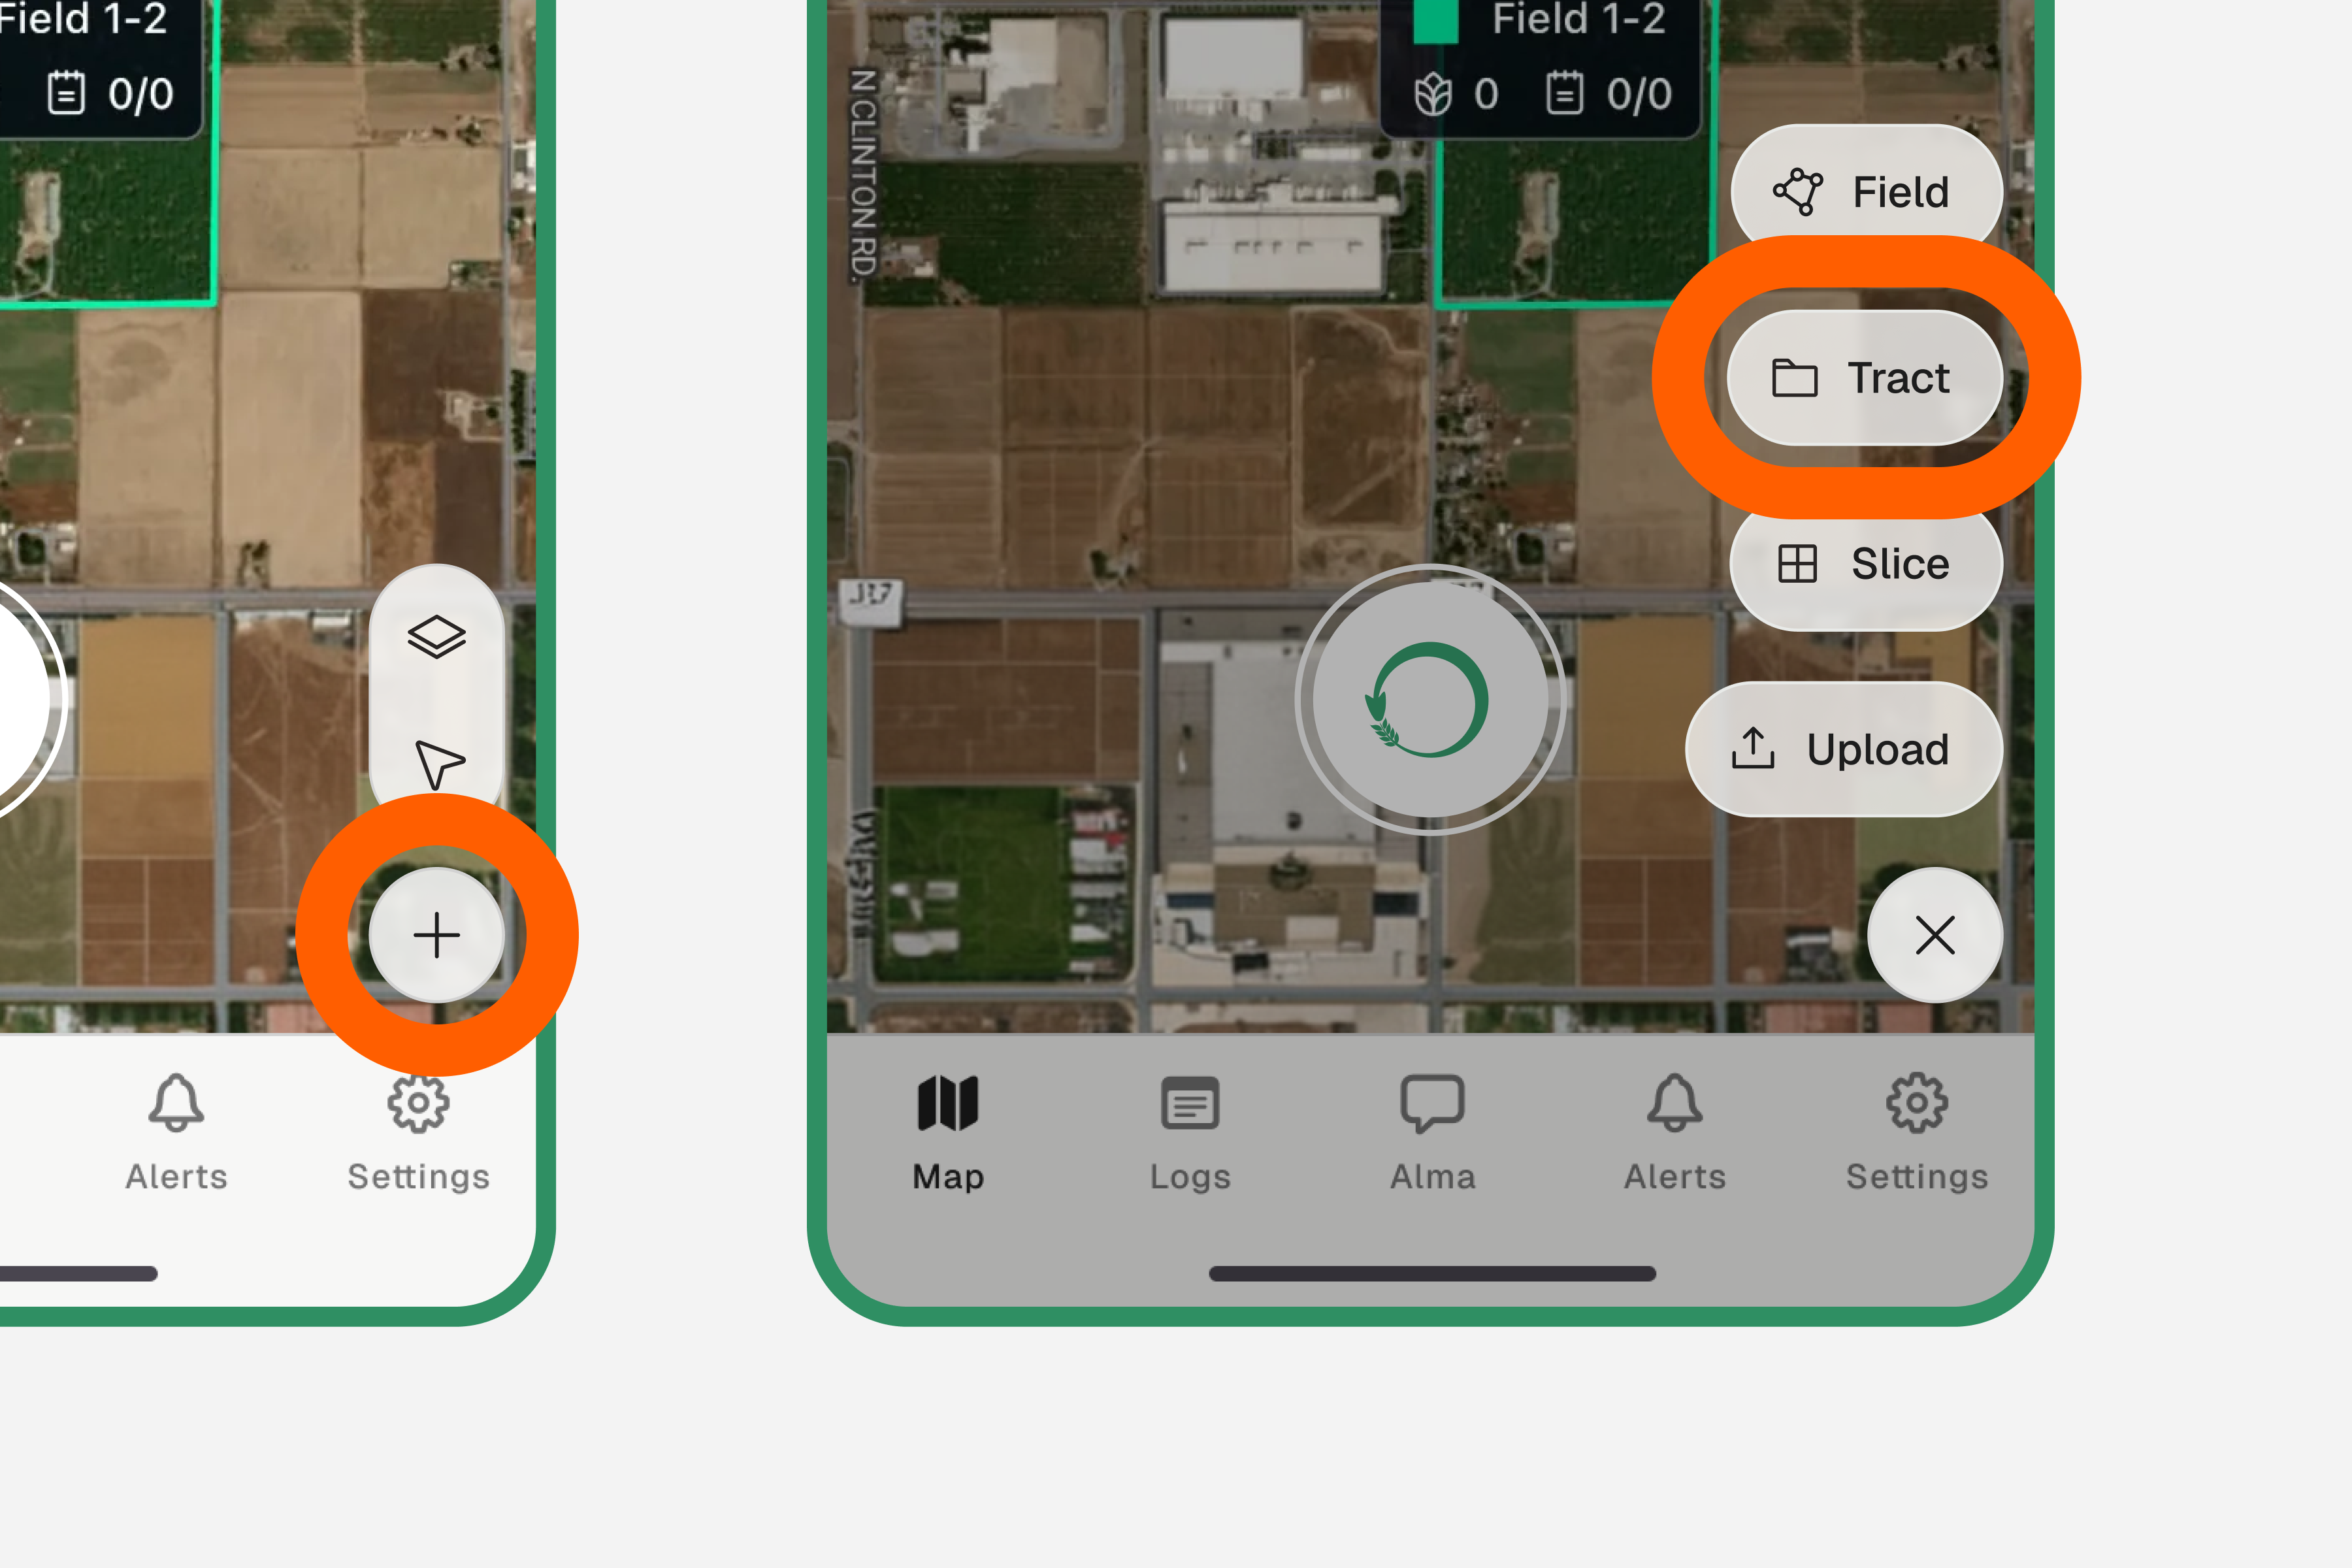
Tap "+" then "Tract"
From the map, tap + and choose Tract.
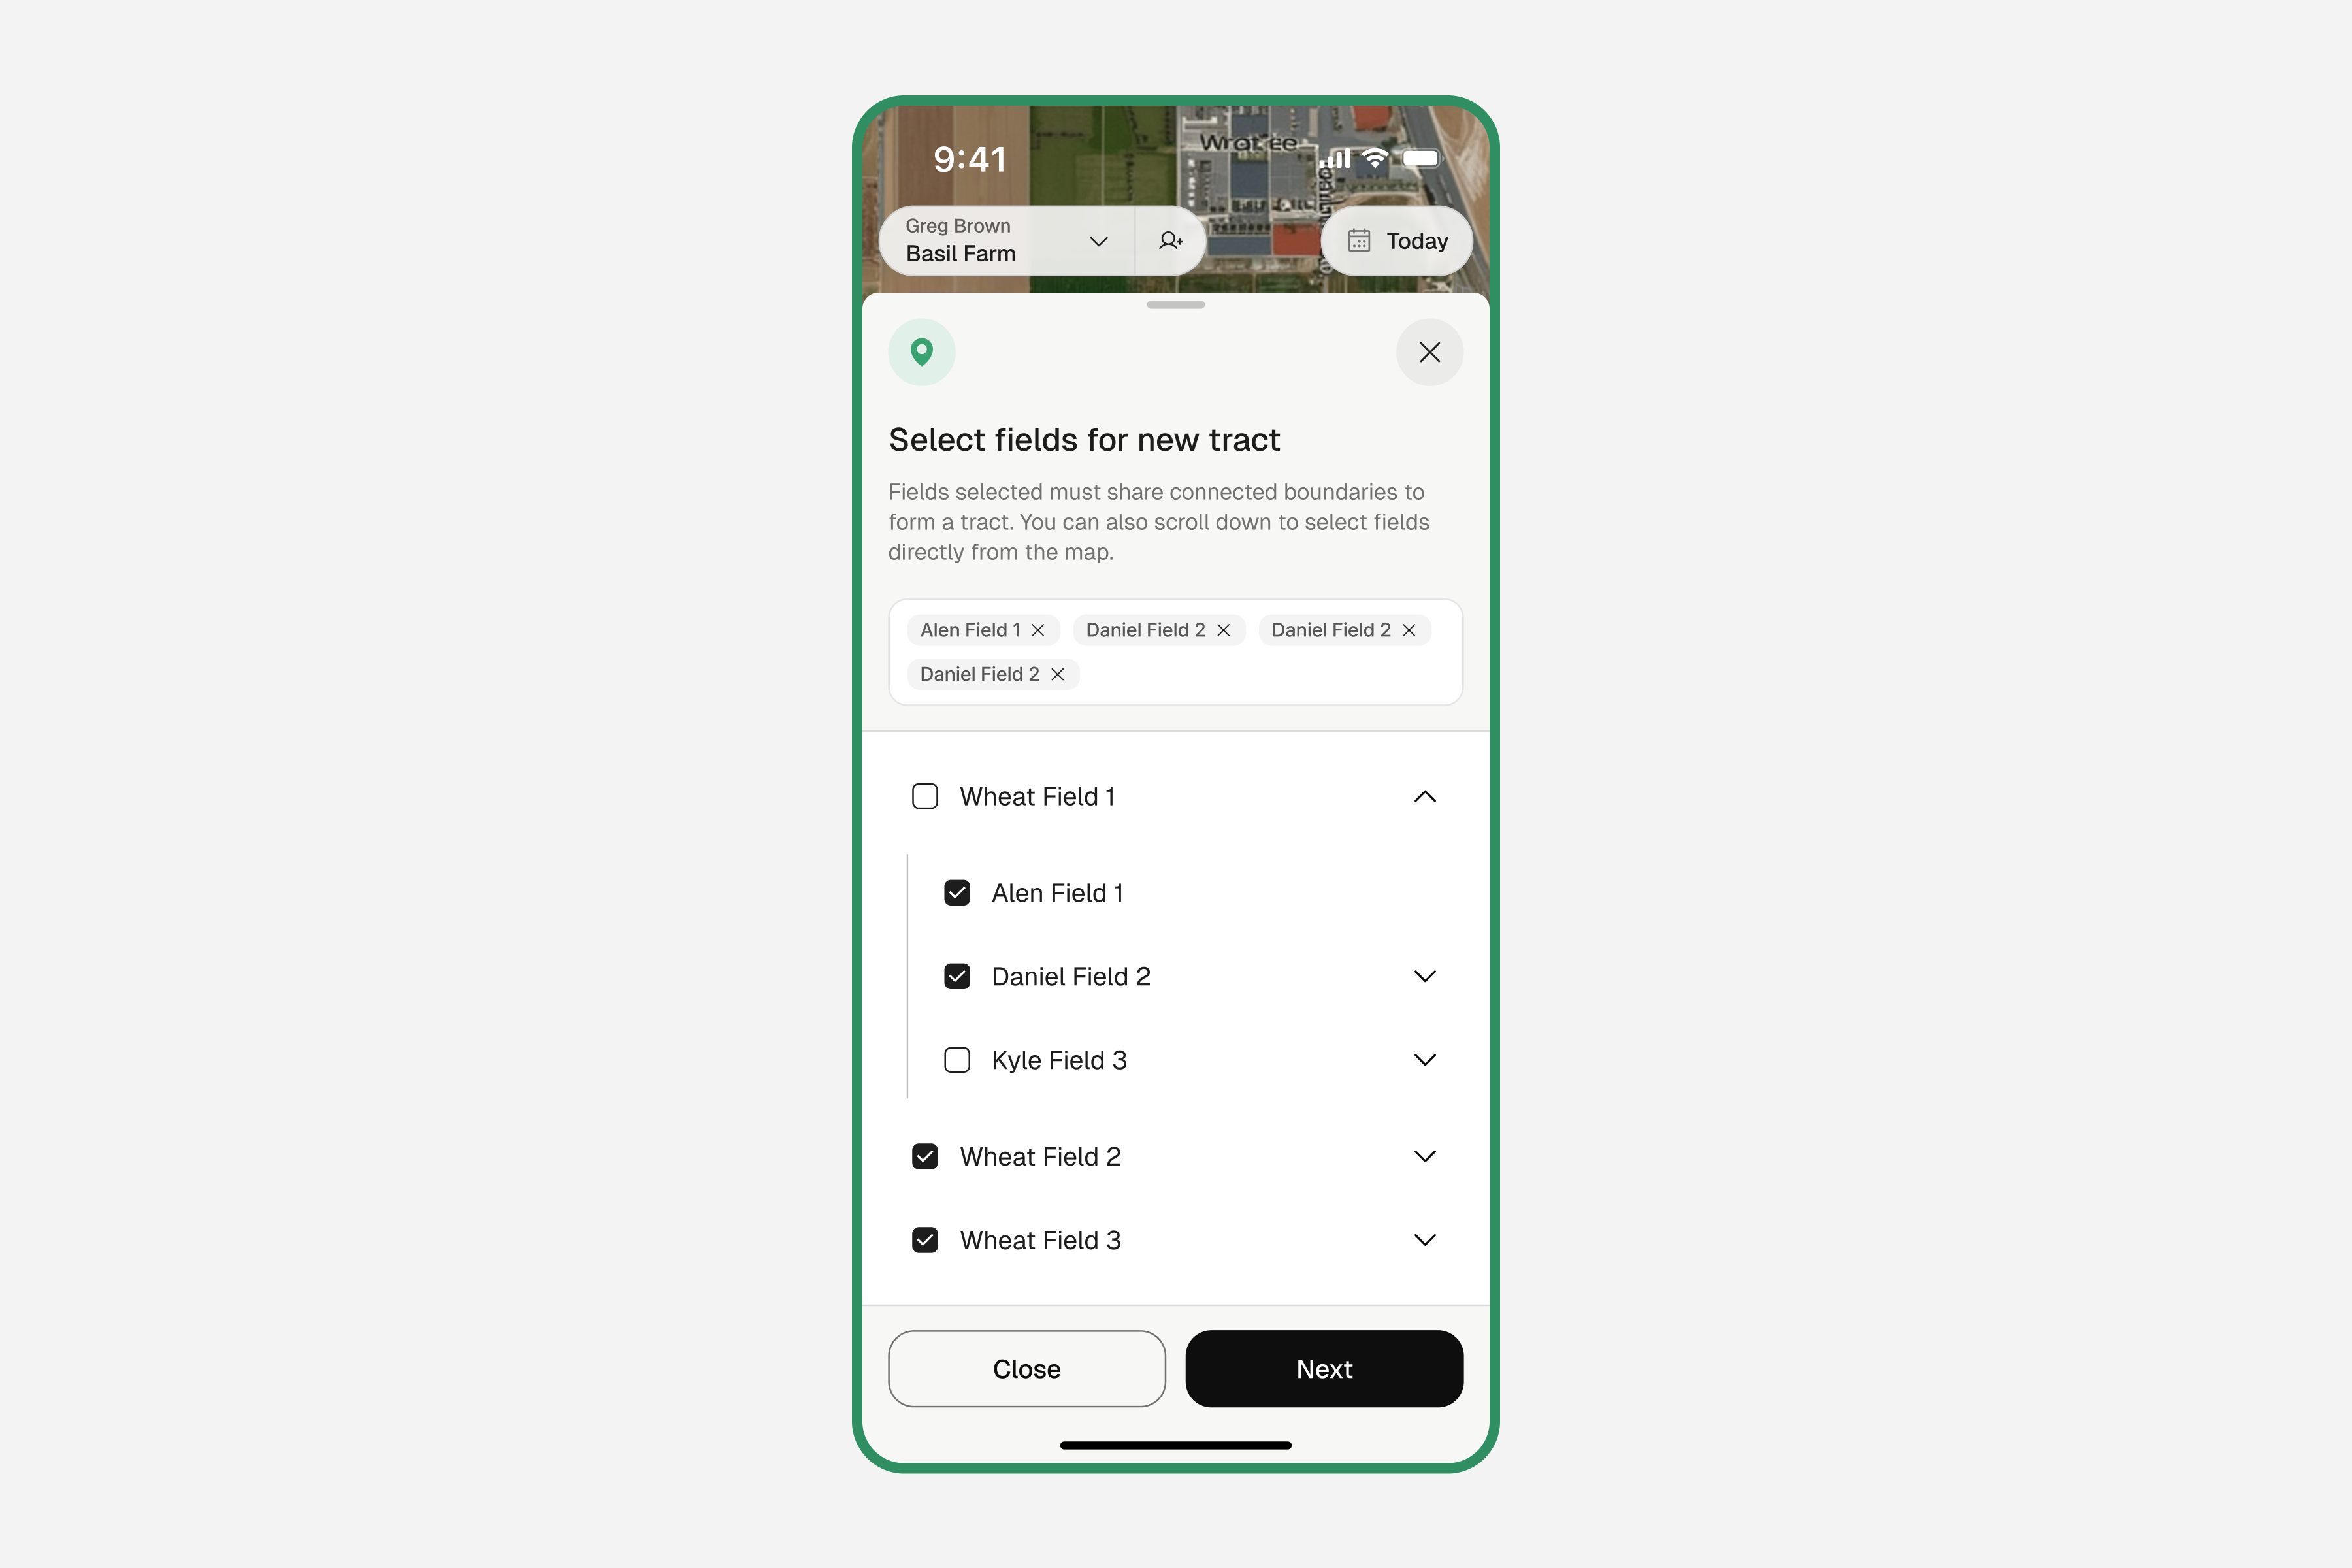
Select fields for your tract
When Select fields for your tract appears, choose the fields you want to include.
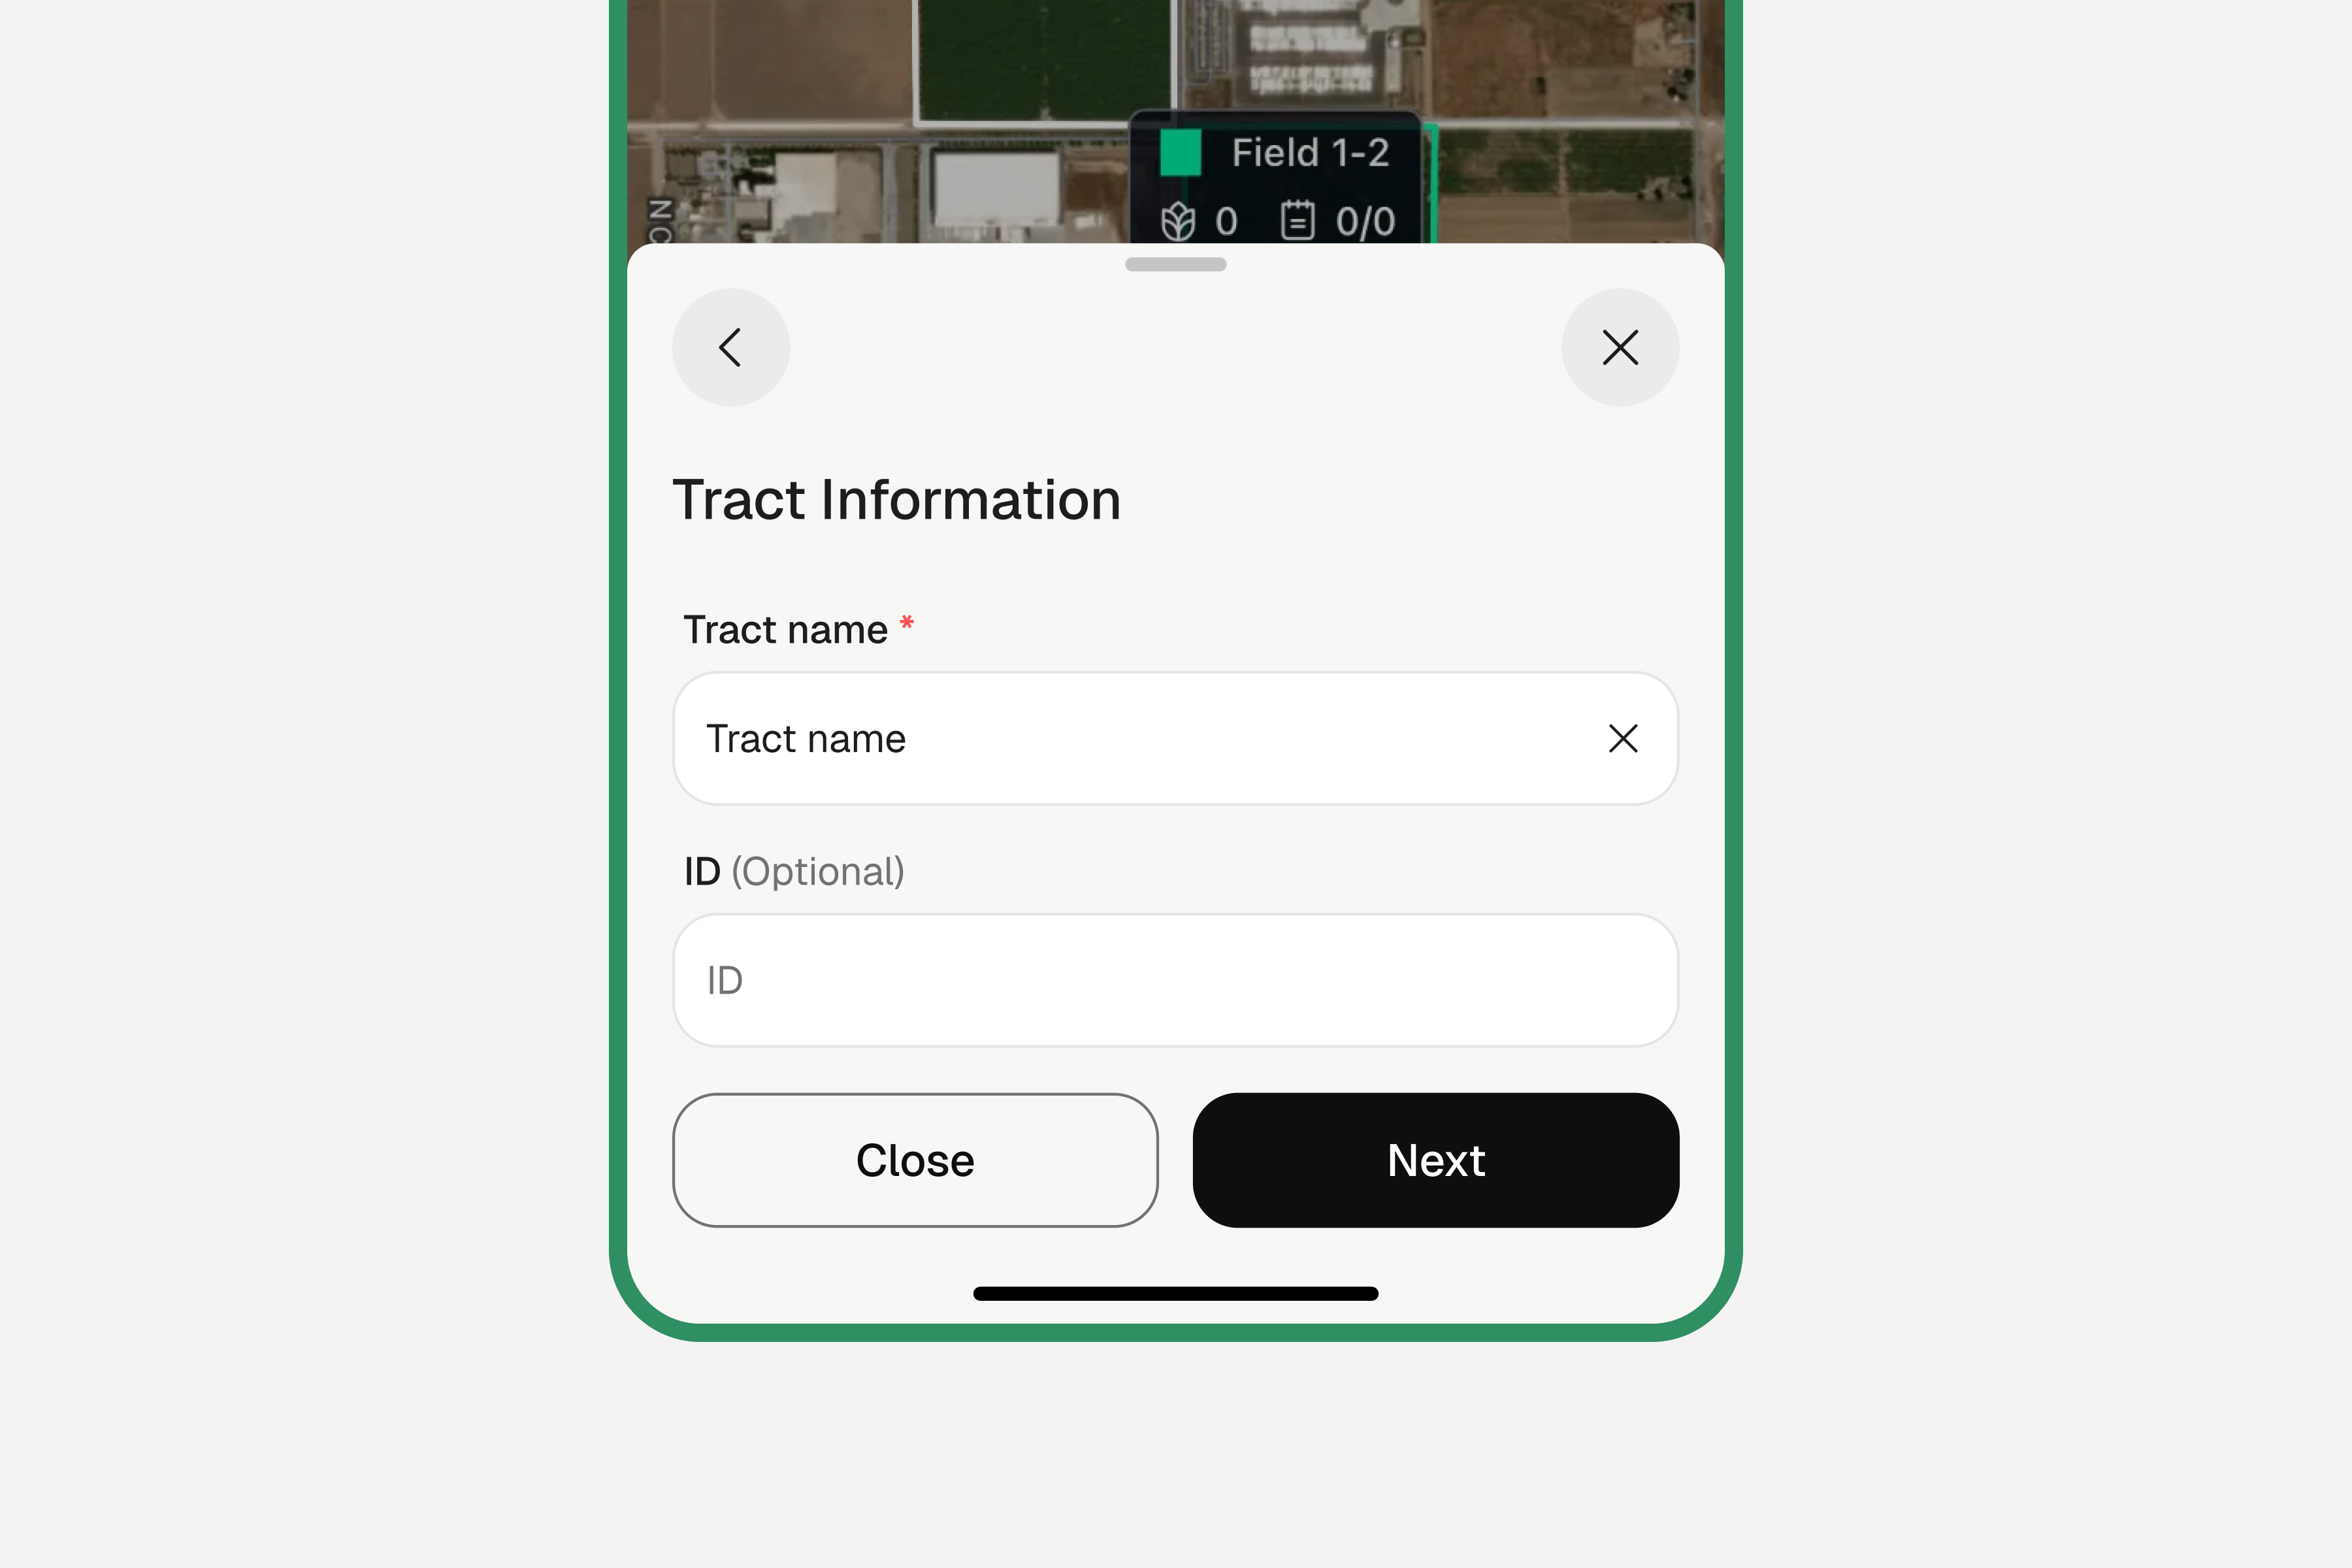
Enter Tract information
Set the Tract name and, if needed, enter an ID.
Pick a tract color
Choose a color so this tract is easy to identify on the map.
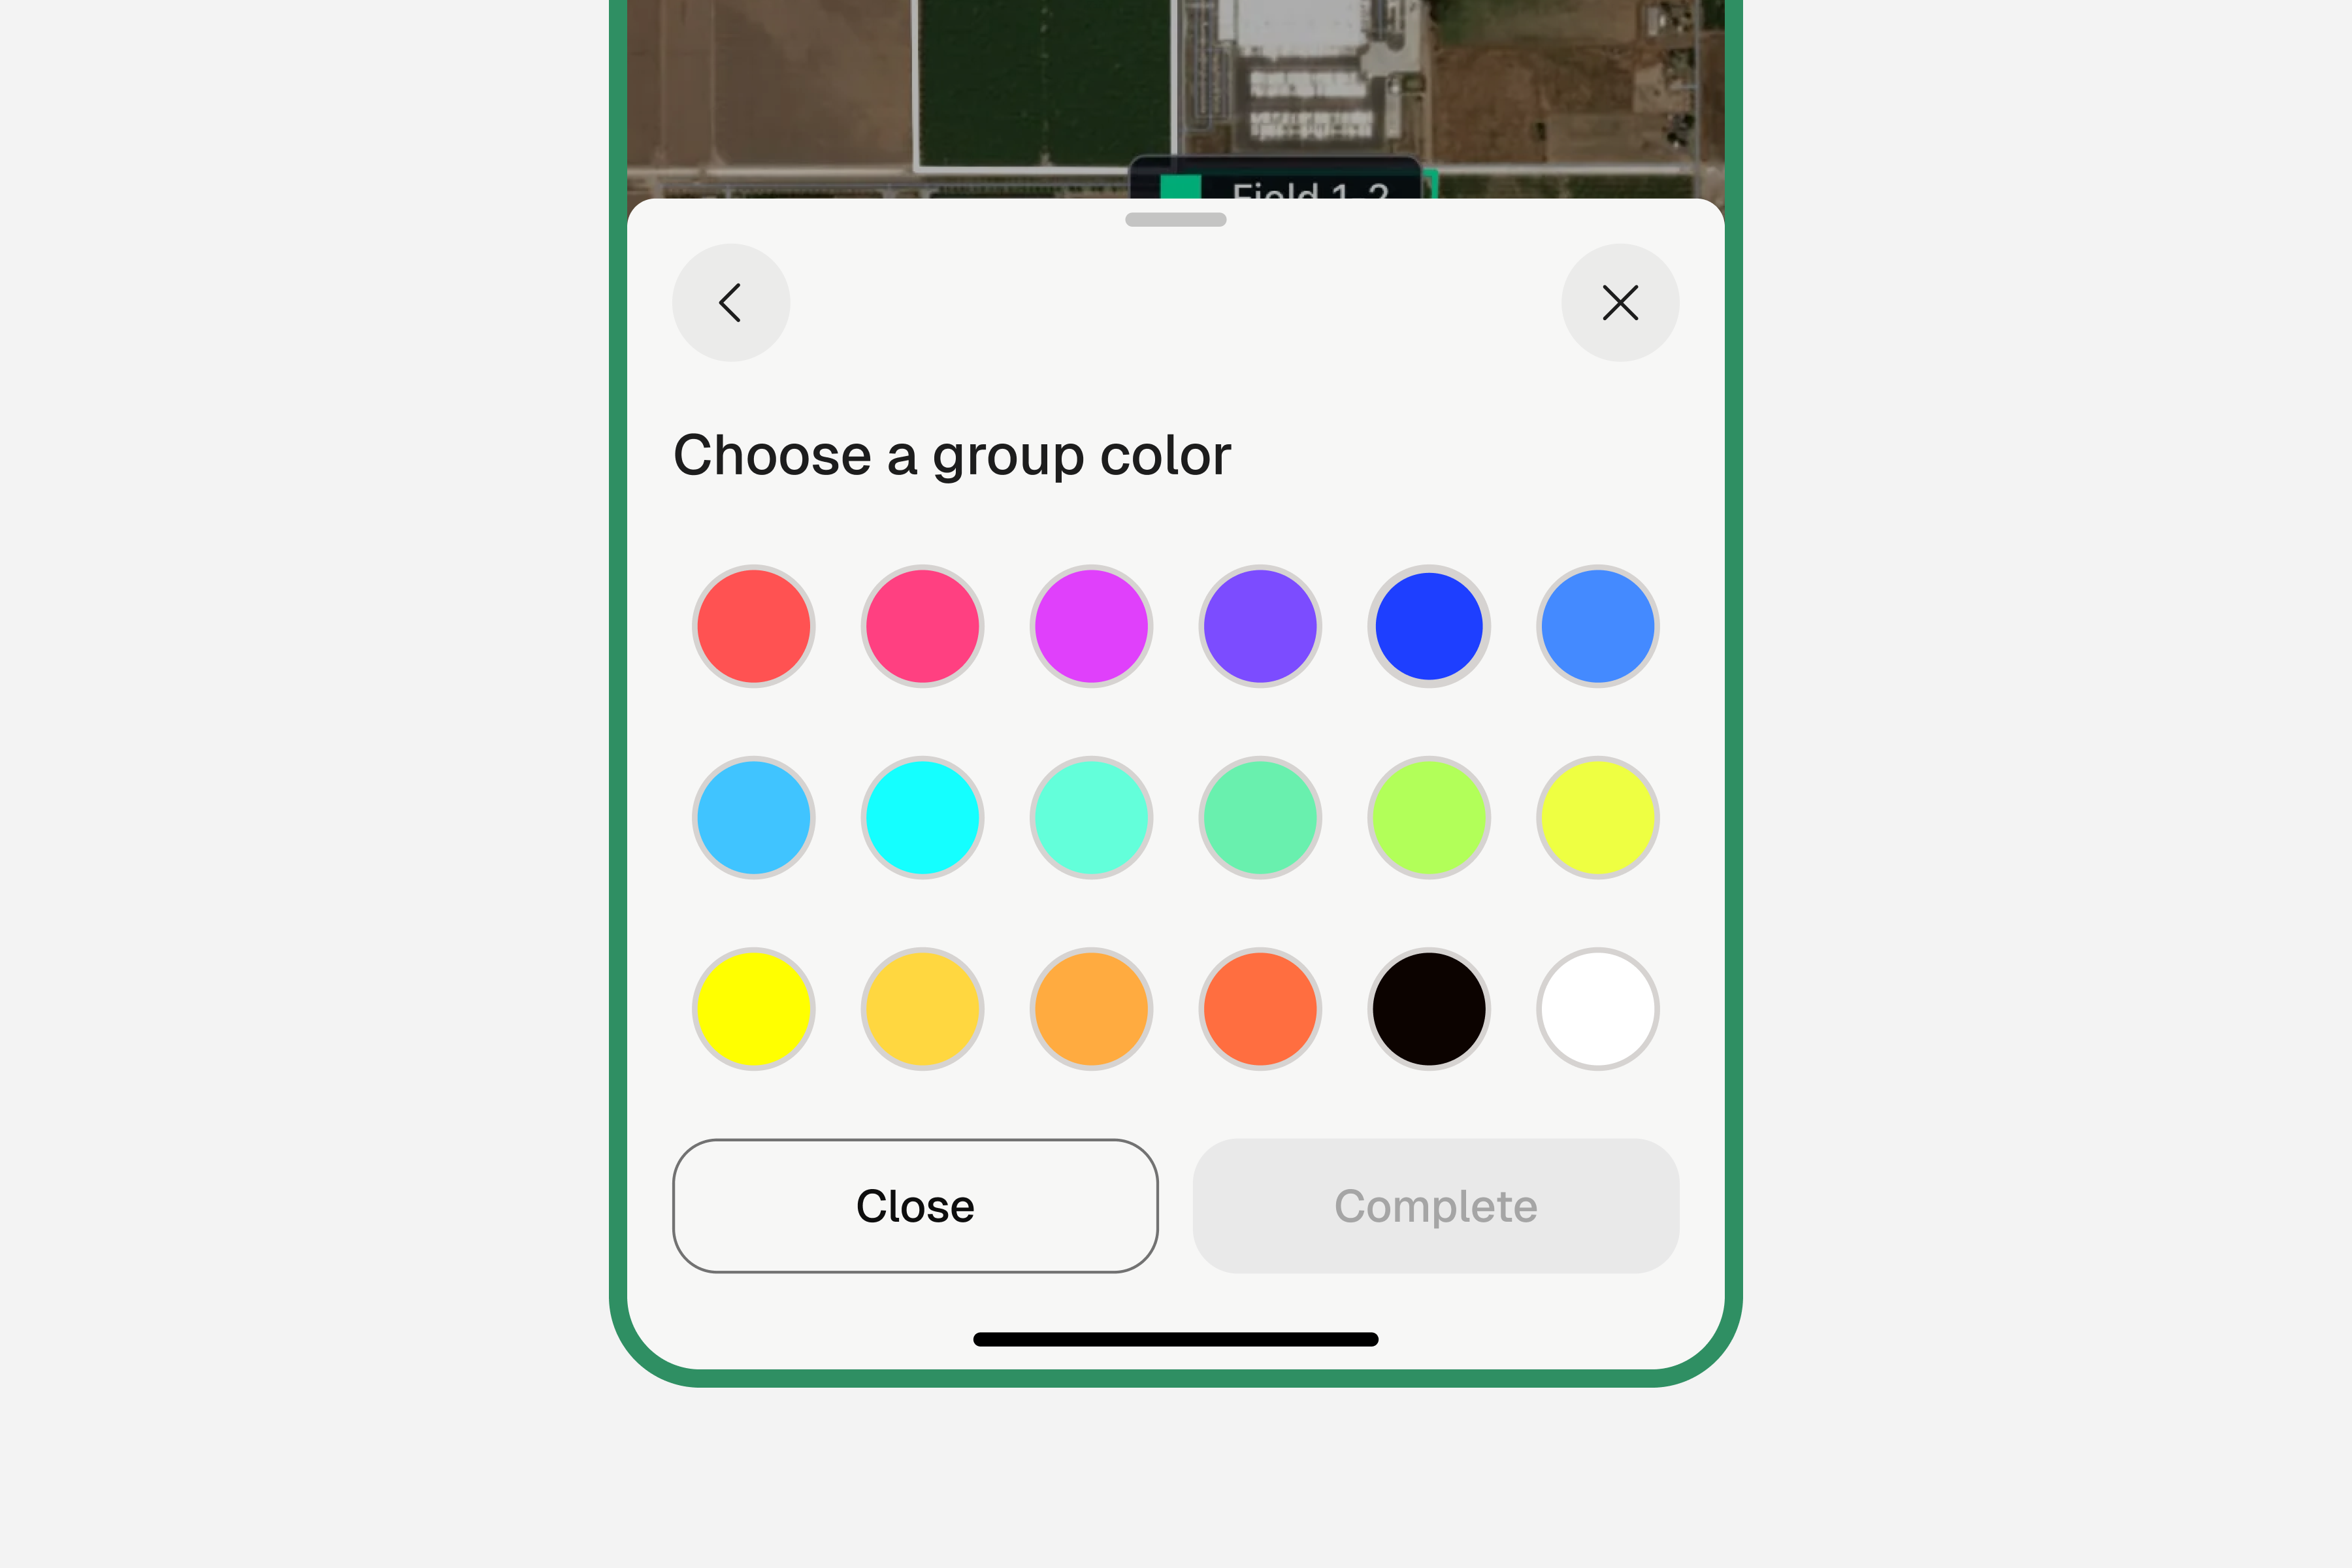
Tap "Complete"
Your tract is created and applied to the selected fields.
Tracts help you filter records and tasks by area, especially on larger farms.
Switching Between Field View and Tract View
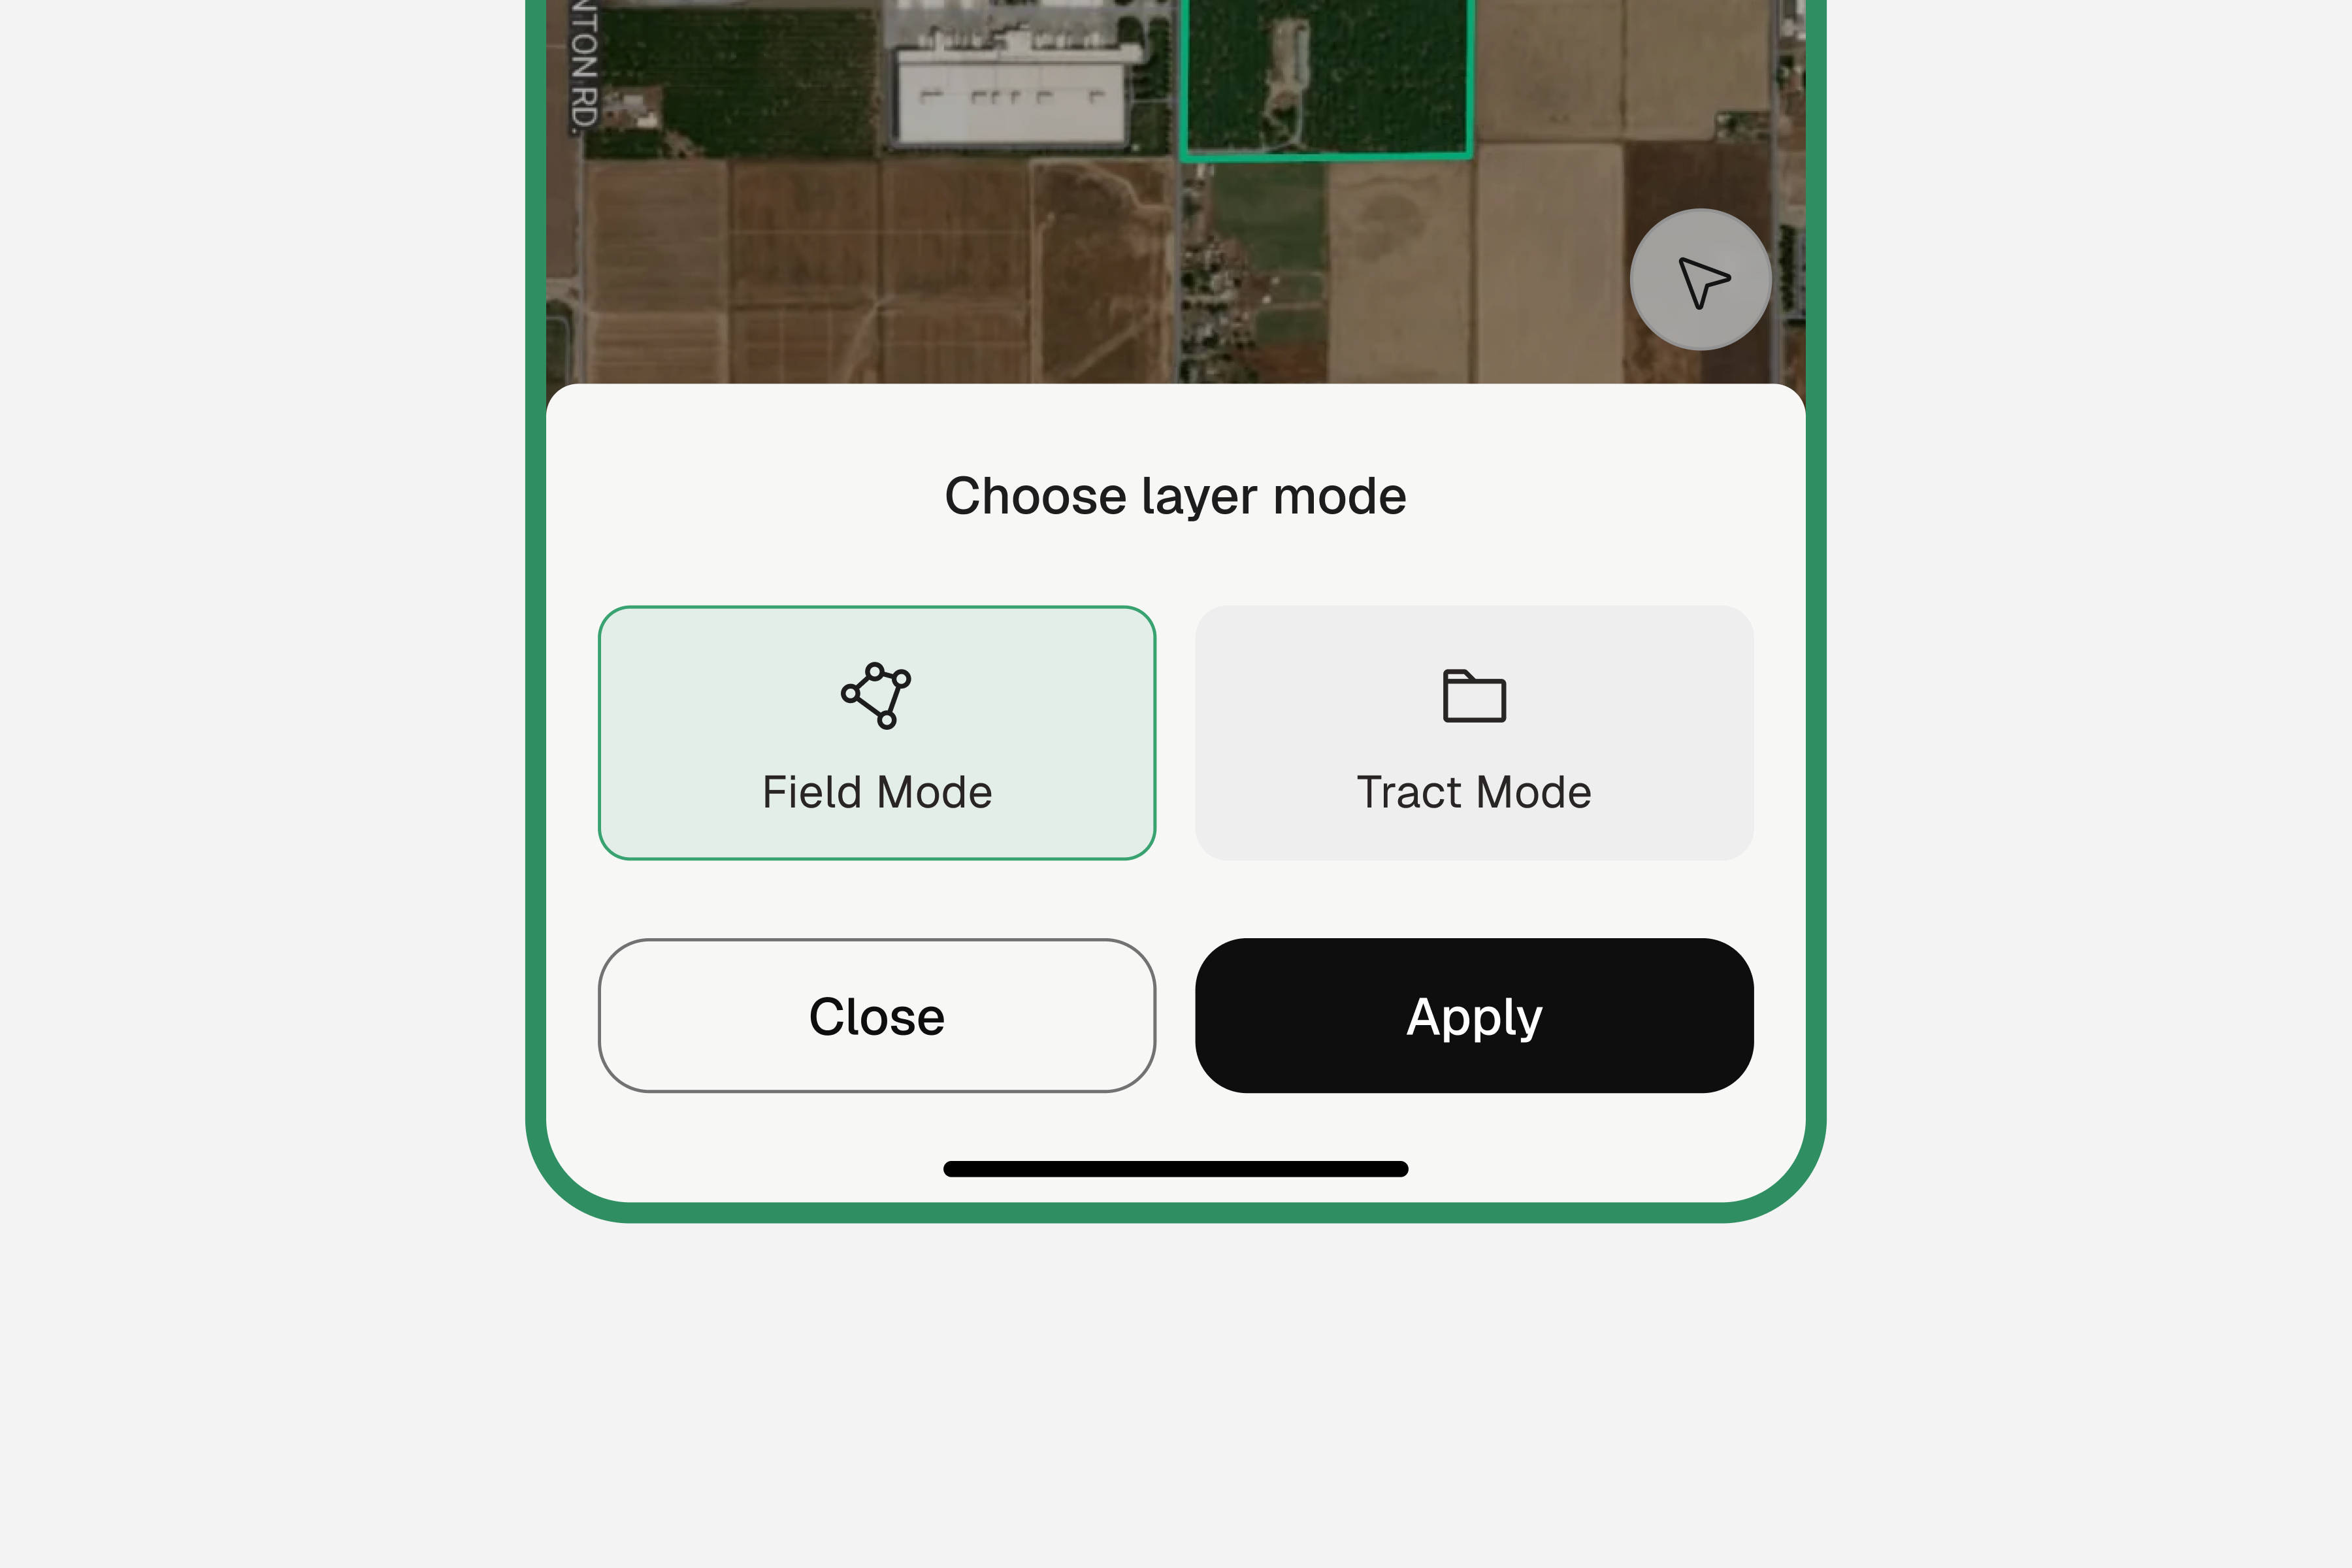
You can change map view mode anytime from the Layers panel.
Tap the Layers button on the map
Open the map options panel from the layer icon.
Choose Field View or Tract View
Tap the view mode you want.
View transitions automatically
The map switches to your selected view mode right away.